As always I am late to a trend again. This time it's bullet journalling - a system of organisation that seems to have taken the entire world by storm.
Bullet journals are typically created in dotted or grid lined notebooks and are intended as a way of planning everything in your life; to do lists, calendars, savings goals, habit trackers and inspiration all sit side by side in a notebook crammed with ideas and information. You might have seen them on Pinterest or instagram. Obviously I needed one.
Being a little bit of a student (aka - cheapskate) meant that I couldn't spring for the coveted Leuchturm 1917 that all the cool kids are using, so instead I went for an orchid coloured soft cover dotted moleksine. Just a word of advice - check what size notebook you're buying, as my moleskine is not the A5 size that is normally used for a bullet journal, it's actually a rather small pocket size (about A6). Personally this doesn't bother me but as you'll see from the photos below, it can inhibit you slightly if you want to follow the 'traditional' BuJo style.
Without further ado, let's get inside my BuJo!
Firstly, There is no index. Not being one for rules, or indexes, I opted not to have one in my BuJo. I don't use them, I forget to fill them in and I couldn't be bothered to write 100 numbers on the bottom of my pages. I don't think personally you need an index to make a bullet journal, especially if your notebook has a divider in it. I also don't have a key (more on that later).
My first page might actually be one of my favourites, even though I probably shouldn't have put in on a single page. I have wanted to track how often and how hard I work out at the gym for ages - partly for fitness reasons, partly for interest and partly for money reasons - and always found it difficult. I find that if I write in my personal diary that I'm going to the gym it gets lost and I can't visually see what I've done. This little tracker makes it super simple and quick to see when I last went and whether or not I've worked as hard as I wanted to.
The workout log continues into the second page, as I wanted to use it for more than two months. On the opposite side of the page I started my first daily page. For my first to do list, I tried to write nicely and put each letter in it's own little box but with a BuJo this small it's a bit difficult to do. Later to do lists just involve writing as I see fit... You'll notice as well that I don't really use the 'correct' symbols in my journal; I find it really difficult to look at a list and say "Yes, that's done" if it's not super obvious. So I've gone with a simple system - box completely coloured for a task completed, box half coloured for a task half completed, box crossed through for a task I didn't do and an arrow if I need to do it tomorrow/some other day. I'm not sure I need much else in my lists, to be honest.
Another couple of daily task lists on these pages, and a reading log. I don't particularly like the reading log because it doesn't really fit a purpose but this is because the notebook is too small - I'd much rather have it in a landscape orientation than a portrait one. No, I still haven't finished Kafka on the Shore (I am cursed with an inability to read the final 70 pages of any book).
Probably my favourite spread in my journal right here. It's a habit tracker designed to track over 6 months whether I'm drinking enough water, not spending enough money and doing enough studying. The studying one is slightly redundant at the moment as I'm on break from university but it's nice to have. I fear that the 2 hour or more limit may have been set too high, but we'll see. I may compromise on that in the future... I can't wait to see this spread completed!
Just a basic, badly drawn, badly thought out future log. I probably won't use something like this again - I write future appointments in my actual diary (I have another A5 moleskine in orchid that I use to remember assignment dates, future appointments, where I'm meant to be on a specific day etc.) But that's ok.
On the left hand side I have created a savings jar; I'm hoping to have this completed by the time I return to university in five weeks (what can I say, I am nothing if not ambitious). I really like this style of savings chart; it helps me keep accountable to actually moving and keeping money in my savings. I may write my starting balance on the page somewhere to remind me what I'm working with. On the right and the subsequent two double page spreads I have listed all the Olympic events that I want to watch this year and when they're on. Or, I will write in when they're on when I get round to it.
I'm planning to draw something in the blank space below the end of the Olympic schedule here. Just another set of daily trackers - actually, probably my favourite set. They're neat, to the point and most importantly FILLED IN! As my journal is more of a task list than a daily diary I don't have days for Thursday and Friday of that week; I was too busy with work so I actually didn't do much worth writing in my journal.
Again, I'm planning to draw something in the space below the end of the diary on the left hand side. I am absolutely in love with my placement notes to do list - I wish all my pages had turned out like this spread! I think that when I've got the drawings done these two double pages could become my favourites in my book. For my placement next semester I'll be working in an inpatient ward for women suffering from the listed illnesses so I need to get my learning done! I'm very excited to go and having somewhere to log what I have written up and what I need to look at is really useful.
Ooph. Basic spending log on the left, again highlighting the error of choosing a small notebook to do this in. I've been trying to write everything in my journal in my Staedtler pens but I was at work when I put the last two amounts in and so they look really scruffy... I don't like the daily lists on the other side either. I need to figure out a decent way of tracking my mood (it's been terrible most of this week) which is why there's a random sad face but it's still in the planning stages atm.
I had some bad news yesterday so I didn't get any of my (two) tasks done when I got home from work - I'm not ashamed to admit I came home, got chinese food and cried whilst watching a movie. Rough day. I do like the dissertation ideas spread on the other side but I wish I'd done it on a double page so I could have put more ideas down. It's crazy that I need to be thinking of this already when I only started my course in January but hey! Needs must. So I'm trying to be organised and get my ideas in one place as much as possible. I'll need to go into each of these topics and research them further at some point, so it's good to have a starting place.
As you can see, as I've used my BuJo more, my daily pages have started to evolve. I have very little need for a monthly spread at the moment but one of the problems with the smaller size journal is that it's only about 40 boxes wide (see the habit tracker below) so doing any kind of substantial monthly layout is impossible. This doesn't bother me massively though. It is a bit of a different take on bullet journalling but I think the underlying message is that you can adapt this system to suit you, your life and most importantly, what you have already. You don't need to go and buy fancy expensive notebooks and pens, you can do this any way you want!
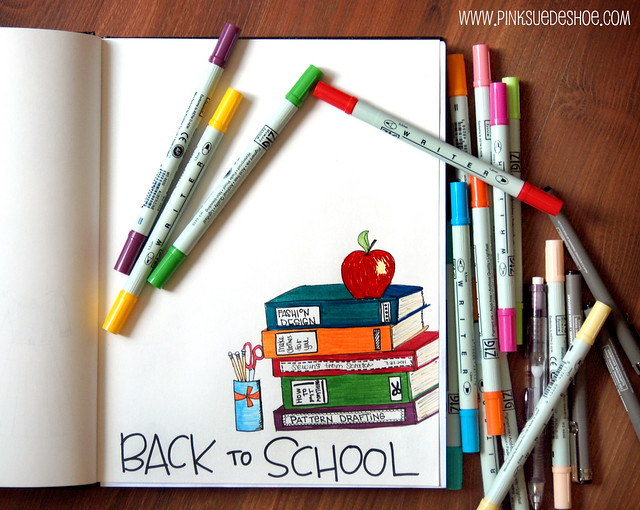
I'm using the Staedtler rollerball pens, as you can see above. I do like them and you can see that they don't bleed through but they do have a tendency to smudge which is more than a little irritating. There's also a limited range of colours but I think you can get a bigger pack if you want.
I love seeing other people's different takes on bullet journalling and the spreads they come up with so please comment below if you have a BuJo blog!
Thursday, 4 August 2016
Wednesday, 8 July 2015
We R Memory Keepers Instagram Album Review - video
I promise I'll be doing a 'proper' blog post soon (perhaps an inside look into my album, as it's starting to come along nicely!)
Sunday, 21 June 2015
Mini TK Maxx Haul - Video
Who doesn't love a good shopping spree? Especially when you get some unique items like these!
Wednesday, 15 April 2015
Let's Talk About... Project Life
Project Life seems to be the hot trend at the moment - but sadly, it's not a trend I think I would be able to keep up with.
For those of you who aren't aware of this brand, Project Life is a new way of scrapbooking that moves away from the traditional 12 x 12 albums, and takes the freedom of a Smashbook even further by utilising a ring binder and plastic pocket system. The initial idea is that you create a weekly spread for each week of the year using different inserts, cards and embellishments. Of course, there are many who use the system differently and do, for instance, monthly spreads, or spreads that are just for important events, but the reason for it's invention was to provide a quick and easy way of documenting your life. Creator Becky Higgins launched Project Life in 2009 as an alternative to the often time consuming world of scrapbook layouts and fiddly paper projects. A Project Life binder can be as simple or as complicated as you want - if you want to just grab your core kit and stick photos onto the pages, and add a little writing, then you can. But if you want to embellish and expand your creativity, there's room for that too, with innovative ways of using the pockets such as shaker cards and sticking die cuts onto the pocket itself. Essentially it is what you make of it!
From Becky's webpage, we can see the 'mission statement' of Project Life -
A secondary issue that I have with Project Life is that it hinges around the idea that you *must* buy the kits that relate to it in order to create with it. This obviously ties in with the ease of use element, as you could fiddle around and cut your own 3 x 4 and 6 x 4 card stock if you so wished, but the whole point is you print your photos, grab them and your supplies (your core kit, album and pockets) and get to it. This to me limits the freedom and creativity that you can bring into a Project Life album and almost gives a lot of the examples I've seen a 'cookie cutter' feel. I do actually own a kit - the Spring collection, which I got from Hobbycraft for £5 - but I don't use it in the traditional manner. If you've watched my Smashbook videos, you'll see that I often use the cards as a backing paper or journalling space. The cards that I have work really nicely for this but I can imagine that not all of the kits would do so. Another thing with the kits that I know I would definitely feel is that I would want more of some cards, and less of others - but you don't get the control over that, which you do if you're buying individual paper sheets and to an extent, a paper pack. Now you do not have to buy these kits just from Becky Higgins as places like Studio Calico and We R Memory Keepers do their own version, but it feels a little to me like collecting more equipment than is needed to really get the job done.
It is worth noting that there is of course the Project Life Web version, which doesn't involve a physical scrapbook but allows you to scrap your photos online into layouts and have them sent to you in the post. Personally I think this seems like a lot of effort when I could just grab my smashbook and do it myself but perhaps that comes back again to the reality that again I wouldn't have much to put in it.
To sum up, as far as I see it the pros of Project Life are as follows:
And the cons:
For more information on Project Life go to Becky Higgins website - http://beckyhiggins.com/project-life/
For those of you who aren't aware of this brand, Project Life is a new way of scrapbooking that moves away from the traditional 12 x 12 albums, and takes the freedom of a Smashbook even further by utilising a ring binder and plastic pocket system. The initial idea is that you create a weekly spread for each week of the year using different inserts, cards and embellishments. Of course, there are many who use the system differently and do, for instance, monthly spreads, or spreads that are just for important events, but the reason for it's invention was to provide a quick and easy way of documenting your life. Creator Becky Higgins launched Project Life in 2009 as an alternative to the often time consuming world of scrapbook layouts and fiddly paper projects. A Project Life binder can be as simple or as complicated as you want - if you want to just grab your core kit and stick photos onto the pages, and add a little writing, then you can. But if you want to embellish and expand your creativity, there's room for that too, with innovative ways of using the pockets such as shaker cards and sticking die cuts onto the pocket itself. Essentially it is what you make of it!
From Becky's webpage, we can see the 'mission statement' of Project Life -
At the core of it all, we recognize that scrapbooking is about so much more than fun designs and cool products. Our philosophy is this: Cultivate a good life and record it. We believe that every day is worth giving your best effort, and life is worth recording. The good times, the seemingly mundane moments, and even sometimes the tough experiences. All of this make up who we are and what we are about, and that is worth documenting and sharing. - (http://beckyhiggins.com/meet-becky-higgins/#sthash.2ZWzGF79.dpuf)Whilst this is something I wholeheartedly agree with, it is equally my biggest issue with Project Life. No matter how I tart it up, my life is just not that interesting. If I took on Project Life tomorrow and did a weekly double page spread, 90% of the photos would be my parents cats. That's fine if they're your own cats, but when they don't even belong to you, devoting 52 double page spreads and a lot of money to a papercraft shrine is a bit much and bordering on the lines of 'crazy cat lady who needs a nice rest in a padded room'. My life is work - gym - TV - sleep. I may occasionally go and see friends, but if I do I rarely take photos. A lot of people who do Project Life seem to be mothers with young children. It's obvious why; the system is great if you have very little time and the risk of sticky, grabby hands trying to eat your wood veneers. It's also a great way to document those firsts that happen a lot more in life when you're under the age of say, 13. I've seen some amazingly colourful and interesting spreads from families which will be truly cherished in years to come. But alas, I am single, childless and do very unremarkable things on a daily basis. My tough experiences involve a weepy rom-com and a pint of Ben and Jerries, and my mundane moments normally pass me by on a treadmill.
A secondary issue that I have with Project Life is that it hinges around the idea that you *must* buy the kits that relate to it in order to create with it. This obviously ties in with the ease of use element, as you could fiddle around and cut your own 3 x 4 and 6 x 4 card stock if you so wished, but the whole point is you print your photos, grab them and your supplies (your core kit, album and pockets) and get to it. This to me limits the freedom and creativity that you can bring into a Project Life album and almost gives a lot of the examples I've seen a 'cookie cutter' feel. I do actually own a kit - the Spring collection, which I got from Hobbycraft for £5 - but I don't use it in the traditional manner. If you've watched my Smashbook videos, you'll see that I often use the cards as a backing paper or journalling space. The cards that I have work really nicely for this but I can imagine that not all of the kits would do so. Another thing with the kits that I know I would definitely feel is that I would want more of some cards, and less of others - but you don't get the control over that, which you do if you're buying individual paper sheets and to an extent, a paper pack. Now you do not have to buy these kits just from Becky Higgins as places like Studio Calico and We R Memory Keepers do their own version, but it feels a little to me like collecting more equipment than is needed to really get the job done.
It is worth noting that there is of course the Project Life Web version, which doesn't involve a physical scrapbook but allows you to scrap your photos online into layouts and have them sent to you in the post. Personally I think this seems like a lot of effort when I could just grab my smashbook and do it myself but perhaps that comes back again to the reality that again I wouldn't have much to put in it.
To sum up, as far as I see it the pros of Project Life are as follows:
- The ability to very quickly generate a layout for a week, with as much involvement as you want/can allow
- The wide variety of different kits, layouts and embellishments that can be used to create your own unique album
- Wide support from other brands that work in line with the Becky Higgins brand
- Useful to document things that you may not feel are 'worthy' of a full page in a Smashbook or scrapbook spread.
And the cons:
- If you don't lead a particularly exciting life, or one within a family unit, there will often be very little you can put down for that week
- Some ephemera will simply not fit in the pockets and so salient bits of information could be left out (guidebooks, maps, outsized tickets)
- Can be expensive compared to other options
- Layouts can sometimes feel confined to the parameters set by the pockets and if the same card collection is used, can look very similar week after week
At this time in my life I must conclude that Project Life is not a system that will work for me. But who knows - I may be converted yet! It's not going to stop me spending a long time on YouTube watching lots of lovely PL process videos :p
For more information on Project Life go to Becky Higgins website - http://beckyhiggins.com/project-life/
Labels:
becky higgins,
becky higgins project life,
lets talk about,
project life,
project life 2015,
pros and cons,
review,
scrapbook,
scrapbooking,
smashbook,
studio calico,
we r memory keepers
Location:
Buckinghamshire, UK
Sunday, 12 April 2015
Smashbook Update #2 - 08/04/2015
An awfully large amount has changed in my life since I did my last flip through so it's time for an update!
Thursday, 19 March 2015
When is a journal not a journal?
I find it really, really hard to put my inner thoughts into writing - this almost certainly relates to the fact that I find it even harder to put my thoughts and feelings into words and tend to bottle up emotions rather than expressing them like I should! Yet art lets me express my feelings and gives me a window to explore these feelings without feeling that I'll be judged.
There is only one page of 'real' journalling in my art journal to date. I hate that page. It feels impulsive, immature and most of all raw. I never read it because when I wrote it I managed to tap into a side of me I try and keep hidden. I'm unlikely to ever show that page to anyone. I'd like to create more written pages but it feels false to me to write down everything that I did in a day. Largely because nothing really that exciting happens!
Yet, I still consider my sketchbook to be a journal/diary style endeavor - every page represents a different day and mood that I was in when I created it. But how much worth does it have as a recollection of my life at this moment in time? Very little. There's no massive revelations in it or astute observations about the world. It's just me creating.
And that's ok.
It's ok to have a journal that's not really a journal. It's ok to have a space just to document your feelings and the odd day. And it's ok to never write if you don't want to.
Part of my ease with this probably comes from the fact that my smashbook documents a lot of the more personal things in my life - events, people and places. But still it's not massively writing heavy. Again my enjoyment of pictures over words wins out.
And that's ok too.
| Dancer from my sketchbook |
Yet, I still consider my sketchbook to be a journal/diary style endeavor - every page represents a different day and mood that I was in when I created it. But how much worth does it have as a recollection of my life at this moment in time? Very little. There's no massive revelations in it or astute observations about the world. It's just me creating.
And that's ok.
It's ok to have a journal that's not really a journal. It's ok to have a space just to document your feelings and the odd day. And it's ok to never write if you don't want to.
Part of my ease with this probably comes from the fact that my smashbook documents a lot of the more personal things in my life - events, people and places. But still it's not massively writing heavy. Again my enjoyment of pictures over words wins out.
And that's ok too.
Wednesday, 4 February 2015
Art Journal Page Progression
My art journal/sketchbook has progressed quite a lot since I started it, when it was originally just a place for sketches. The only rule in my sketchbook now is 'No removal of pages'. If it sucks, it doesn't matter, it stays.
I thought it might be interesting to see how I go about creating a page, as I'm still pretty new to the idea and as always, am still learning. So here we go, one of my pages from start to finish!
You may notice that this double page spread has streaks of green paint on it, ahem, because I'm not exactly the neatest worker. Yes, the page before this is green. But it's ok, because the first thing to do is to prime the page using Gesso.
Gesso is pretty amazing stuff. The pages in my sketch book aren't that thick - it's a cheap, generic one from an arts store. If you have a watercolour/acrylic paper sketchbook you almost certainly won't need to do this but if you're working on paper that's a little thin, it's a great first step. Gesso will add thickness and if you desire, a little texture to your pages.
As you can see, although the pages are slightly crinkled now they're a hell of a lot more of a blank canvas to work on. The second page has some texture added for next time.
Using a dry small paintbrush, I attacked the page with acrylic mixed with gesso in various quantities. You can do anything you want for the background, but I tend to go with acrylic as it adds depth and texture as well. Next time though I want to use watercolours for a more washed out feel.
I've had this song stuck in my head for some time now, so it was the first quote that came to mind. It's written on washi tape. The background doesn't really correlate but meh. I stenciled in black acrylic a flower and wrote the final word of the lyric in large print.
Everyone needs a cloud!
And what does every cloud need? Some sparkle.
The above three series are to show that you can muck up and fix it - it doesn't matter! I wanted to stamp a flower border along the bottom but the ink wouldn't stick and I positioned it wrong. No worries, stick something over the top!
Glossy accents on the flower.
The bottom corner looked a little bare, so I stenciled another flower, glitter glued and put glossy accents on it.
A few more details and it's done!
I hope you can see how I progress with my pages. I'd love to see how you do yours and what inspires you to make a page; do you work off of quotes and lyrics or photos and craft materials you have lying around?
Wednesday, 28 January 2015
Art Journalling - Favourite Five Blogs
Art journalling is something I've really been getting into over the last few months - and I'll be honest, I tend to spend my free time browsing pinterest nowadays rather than updating either of my blogs or shamefully, doing my own crafty pursuits! Along the way I've discovered some fantastic blogs that are incredibly inspiring and always have me craving some along time with my own journals.
What makes a great art journal blog? Clear photos, progression through the design and most of all, an inspiring attitude. It doesn't matter if you produce perfect art or if you only use two pencils and some string. It's about the passion.
Without further ado, in no particular order...
Artisty Crafty by Marta Lapkowska
Marta combines beautiful materials with a clear understanding for composition in all her projects; I absolutely love her use of 3D elements in her pieces. As her art journals are made from old hardback books, her work has an extra dimension that is often missing from plain page journals. I now really want to use a book as a journal but would feel a bit silly running four at once! I love how bold she is with colour use as well.
http://artistycrafty.blogspot.ie/
Notes on Paper by Julie Kirk
Whilst Julie from Notes on Paper is strictly an art journalist, but rather a paper crafter for all occasions, her tutorial on how to compose an art journal page from the very start is one of the first ones that I saw that got me working on my own journal. In contrast to Marta and the others in this list, she use a lined notebook as part of a 'Learn Something New Everyday' Journal - which gives a fantastic effect of relieving the pressure of a plain page in a sketchbook. And the tips she provides are really great for the novice journaller; it can be really easy to get bogged down feeling that you need to have lots of different expenive materials to create something special.
http://notesonpaper.blogspot.co.uk/
Pink Suede Shoe
I think the most inspiring thing I find about Pinksuedeshoe.com is that her style is so simple, and yet so beautiful and effective. Her journal pages are uncomplicated and just a true reflection of her thoughts and desires at that moment - isn't that really what we all aim for in a journal? Plus her sewing items are absolutely gorgeous too.
Words of Me Project
Words of Me never fails to produce a beautiful page, which always has a deep meaning and highly creative depth to it. She manages to combine colours and elements in a manor of which I can just dream - it's stunning. Her tag line for her blog is 'I hope I've inspired you to tell your story'; which she truly has for me. Reading through her blog gives me a lot of things to think about that are not limited to the wonderful art journalling pages she posts. We could all use a little bit of her positivity I think!
Annawhocropsalot
Anna manages to do what I so wish I could - she creates not only a useful diary page, but also one that is absolutely beautifully busy and creative. Her diaries are the ones that I could see being passed down from mother to child to grandchild and each generation getting as much joy and energy out of as the last. Her art journal pages and scrapbook pages are no exception either.
So go ahead and check them all out! Who's your favourite art journal blogger? What inspires you to create? And do you have a blog yourself? I'm always looking for more to follow :) I'll do a post with my favourite pages soon for you all to see inside my journal!
Thursday, 6 November 2014
The Progression of Planning
In my last post regarding my Personal sized Finsbury, which was, ahem, over a year ago now, I was using it fairly regularly and quite enjoyed the different things I found to go in it. Now a busy full time job, gym schedule, moving house, two weddings, two deaths and a break up later - and I barely have time to use it at all.
In fact, shamefully, until I wrote this post I wasn't even sure where it was... (I blame the very recent house move for that). When I found it though, I did find a couple of weeks with the lovely diary insert that I bought off of Etsy that I thought were worth sharing -
Delving back into this blog got me thinking though - could I manage my time better, and if I could, how would I do it? Does it really just take a little bit more planning and effort to fix all the time management problems in my life? Or are some people, like myself, just destined to always be chasing their tails no matter how many Filofaxes, Dodo Pads, Midoris and Google Calendars they have?
At work I find sometimes that I forget about events until the last minute, which is not great when most of my job is focused around events and is punctuated by meetings and a long to-do list. I use a DoDo pad but for the most part, I use it just for logging in my annual leave hours. It never leaves the office - which makes it a bit pointless!
I don't even use my A4 Metropol and I have no idea where my A5 or Domino are. Shame on me!
I think I'm going to see if I can get back into using my filofaxes, otherwise in the new year it may be time to let at least one of them go.
Sunday, 12 January 2014
New Smashbook - New video
I just can't wait to get started on this - I'm going to use it for lots of lovely things! Like an IRL pinterest board :D
I promise when I get my hands on a new camera I'll be updating this blog at least weekly. Hold this space.
Tuesday, 30 July 2013
Inside my Personal Filo (video update)
Excuse the clunky title...
I rather enjoyed making my Smashbook video last weekend so I thought I'd make an updated version of my old 'Inside my Filo' video from 10 months ago. My filo has changed somewhat!
I tried to keep it short and failed miserably I'm afraid, it's just under 10 minutes long. Whoops.
I will be posting a 'my week' post soon to discuss how I'm organising my weeks in more detail so stay tuned for that! Anyone else a video addict? They are so much fun to make. I would love to see your videos too so please leave me a comment either on Youtube or this post with your username etc. so I can check more people out.
Friday, 26 July 2013
Smashbook update #1
Back in January I posted about a christmas present I received; a Smashbook (Pink edition). I have done a couple of youtube videos on it but I haven't really blogged about it until today... So here's an overview of the pages I've completed so far.
First page
So, my first double page spread is dedicated to me and my boyfriend. We've been together for nearly 3 years so I wanted something nice to document our relationship a little bit!
I didn't go overboard with the photos, preferring to put in things like the dried roses that he bought me for our anniversary last year and a love note he sent me ages ago. The song lyrics are my favourite song that reminds me of him. In the bottom right hand corner is the bracelet that I made him but fell off due to wear - that is the essence of Smashbooking to me. It doesn't just have to be photos and words!
Second page
You may recognise this page and the previous page if you've watched my youtube channel as they were featured in my videos briefly. Originally this was going to be a page just for ticket stubs to concerts and theatre events I've been to, but it soon turned into a page for tickets of all kinds. I kind of like the busy feel to the page!
Third page
It's probably no secret that I've been to Amsterdam twice, and that I love the city. This page is mainly tickets and stubs from my last trip there but does feature some bits from my first trip... It's more easy to see on the flick through video I did a while back because there's lots of hidden goodies on this page underneath tickets.
Fourth page
I graduated! Yay! I'm very proud of this page. It took a lot longer than most people who I went to school with but I did it :) Not much else to say about this really - I just like basking in the glow of my achievement!
Seventh page
First page
So, my first double page spread is dedicated to me and my boyfriend. We've been together for nearly 3 years so I wanted something nice to document our relationship a little bit!
I didn't go overboard with the photos, preferring to put in things like the dried roses that he bought me for our anniversary last year and a love note he sent me ages ago. The song lyrics are my favourite song that reminds me of him. In the bottom right hand corner is the bracelet that I made him but fell off due to wear - that is the essence of Smashbooking to me. It doesn't just have to be photos and words!
Second page
You may recognise this page and the previous page if you've watched my youtube channel as they were featured in my videos briefly. Originally this was going to be a page just for ticket stubs to concerts and theatre events I've been to, but it soon turned into a page for tickets of all kinds. I kind of like the busy feel to the page!
Third page
It's probably no secret that I've been to Amsterdam twice, and that I love the city. This page is mainly tickets and stubs from my last trip there but does feature some bits from my first trip... It's more easy to see on the flick through video I did a while back because there's lots of hidden goodies on this page underneath tickets.
Fourth page
Way back in 1998, my parents bought me and my sister a kitten each. My cat was promptly named Snowball and my sister's was named Poppet 'because she looked really sweet'. Turns out the cat was a nutcase. A lovely, friendly, gentle nutter. Unfortunately our little crazy kitty passed away last October at the age of 14.5 years (but not before making a 75 mile trip to Telford, after she got herself inside a van travelling that way just before it left. I'm not making that up.)
'One must love a cat on it's own terms'. That we did.
Fifth page
The Color Run is an American 5k run that's recently been brought over to the UK. I've wanted to run in this race since I first heard about it a few years ago - and when I heard they were going to be holding one in the UK, I just had to be in it! Me and my Dad ran together. It was an amazing experience, and I can't wait to go again (and hopefully get more colored!). To be honest, I don't really like this page. It's not bright enough. I think eventually I will attack it with some paint of my own and make it really colourful!
Sixth page
I graduated! Yay! I'm very proud of this page. It took a lot longer than most people who I went to school with but I did it :) Not much else to say about this really - I just like basking in the glow of my achievement!
Seventh page
This is another set that you may have seen before if you've watched my youtube videos. This one focuses on my hobbies and activities that I love to do. The smash book is all about me so having a page devoted to things I love to do was a must! I wish I had more room on this page as there's so much I could've included.
If you want to hear me talk about these pages a little more in depth, then check out this video:
How do you use your smashbook? Is it more of a scrapbook style or is it 'anything and everything'? I've seen some fantastic examples of both. Do you use something unconventional to smash into?
Tuesday, 25 June 2013
My week 17/06/13 - 23/06/13
In an effort to brighten my planner up a bit, I've been experimenting with washi tape and diving the diary pages up. I don't think I'll stay in the standard FF diary insert next year - the weekends annoy me, the design feels stuffy and I find it really uninspiring. Hopefully by January I'll have a decent enough job so that I can afford some nice expensive inserts!
My apologies for the large pixelated bits, those are secret blog post ideas that you can't see yet! Since finishing uni I've not been doing much really, which is why my diary is basically a workout log right now. I should be starting work at the end of July though and when I do I can start pole dancing again (a hobby I picked up at uni) and can join a few clubs or something so that I'm not so bored! I do have a possible little project that I may be unveiling in a few weeks time if all goes to plan... So watch this space.
Friday, 21 June 2013
Blog planning sheets
Now that I've got time to blog again, I've got a lot of ideas for upcoming blog posts that I want to write and post. I started writing titles down in my diary - but this doesn't give much scope for long titles, changes and a general record of when things have been written and are ready to go. So I grabbed an old to-do list and made my own blog post record sheet!
So what's going on on this insert? Well, it's slightly customised as you can see. Here's a closer view:
The first row is the title of the blog post and any specifics I need to put in (for instance, the name of the polish I'm featuring). The second row, split into three sections, is the most important - on the left I have a check box for whether or not I've written the post yet (W), then a box for whether or not I've photographed the things I need for the post (Ph) and finally, the date that I'm going to post the piece on. Some of them have dates but some of them have 'queue' written in this box - these are my back up, 'Oh man, I haven't got time to blog today!' throw away posts that are a bit generic and I can just log on and post it without having to worry about what I'm writing when I'm short of time. The two different colours represent my two different blogs; my nail and beauty blog is in pink and this blog is in blue. This helps me keep track of how many posts I've written for each one and when I posted them so that I don't post too much on one and not enough on the other.
By knowing what I want to write I can be sure that I won't have writers block and when I've got a spare evening, I can sit down and work on one of my posts! Win! The only problem is... this was my last sheet of 'to do' lists so I'm going to have to figure out whether I want to buy a new pack (hopefully in cotton cream does anyone know if they do them?) and customise them myself again or if I want to try and make my own up. Decisions, decisions...
Does anyone else plan their blog posts? How do you do it?
Tuesday, 14 May 2013
Dilemma... again.
Now that the end of uni is very much insight I need to figure out what to do with the two filofaxes I don't use - my pocket Domino (you can read about it's discovery here) and my A4 zip Metropol (previous post detailing it's major failings here). My personal Finsbury is definitely staying right where it is, but these two may soon find themselves on the Adspot or ebay...
The Domino has been sat in my desk for the last 6 months picking up dust. I started using it as a nail varnish catalogue but I've found Evernote to be better for this, and my passion for nail polish is starting to wane somewhat as I have no money to buy it and my nails are in awful condition from too much acetone :( Since I got it from a charity shop, and it's in fairly 'well loved' condition, I might just donate it back into the system again.
The saga of the Metropol is definitely ongoing... in the end, I did store my uni notes for my dissertation etc. in it but the diary was quickly removed and it became a glorified ringbinder. After uni I want to take up learning languages again but I'm unsure whether it will be worth keeping hold of just for this sake. I'd need to spruce up the dividers (and maybe finish my drawings on them, 'cos that never happened...) but unless I was writing comprehension out, or self testing, I can't see myself using it that much. Another option is using it as a pure financial records holder; something that I need to learn but equally for someone who is *awful* with numbers something that is quite daunting.
Sigh. It's tricky! Moving into a smaller flat has definitely got my 'GET RID OF ALL POSSESSIONS' urges going :/
Sunday, 12 May 2013
My past few weeks
It's been hectic here! This time next week I will be officially moved in with my wonderful boyfriend and I will have (largely) moved out of my university house - only returning at the end of May to finish up uni work by presenting my dissertation to a group of markers. It's been a wild three years full of love, laughter and far too many tears and I'm not really sure how I feel about leaving this little town; but being able to live with my boyfriend and close to my family rather than having to make a 5 hour door to door trip will be amazing.
As you can imagine, the end of uni has meant that I've been pretty hectic so my filo has been put to good use. Here's the last four weeks in my diary pages:
And here's the week coming up:
I always feel, no matter what, my diary pages are quite clunky and unappealing to look at :( I need to stop writing things in with black felt tip in big letters I think! Even though I'm finishing uni on Thursday I'm very busy over the next three months so having my filo to hand is going to be even more important.
Thursday, 25 April 2013
Cult Pens Haul
I don't normally splurge on pens, but occasionally you just have to don't you? I'd never ordered from Cult Pens before but I decided to give it a go, especially as their postage rates were cheap (free over £10) and they have such a wide selection.
I ended up getting an assortment of pens; one calligraphy liner, two fineliners, one highlighter, one gel pen and four rollerballs. Whoops. I swatched them all and then decided that in this post I would rather focus on the four rollerball pens, as they will be the ones I'll be using the most often in my Filofax and generally. I tested them all on filofax paper and on the scrap paper I use to make most of my blank inserts as this is what you find in my filofax!
As you can see, all four write really nicely and there's not a massive amount of show through on the other side. Whilst there is a little bit from the Uni-ball it's not enough to put me off using it on this paper. I imagine that cotton cream filofax paper would have similar results as the scrap paper I use is comparable to the weight and colour of it (even though it looks a bit grey in these photos).
Now for the filofax paper - again I just used some random address paper scraps I had lying around as I didn't want to ruin my diary if they bled or were bad for showing through!
As you can see, on the Filofax page none of them are particularly good at being invisible on the underside and the Uni-ball Elite in particular is quite prominent. However it's not as bad as some pens I've used! I think I'm going to do a trial run of using the Antique pens in my Finsbury as the main writing implement. They all make my handwriting lovely and neat which makes me very happy! They'll be great to use in my revision posters and notes for my upcoming final exams. Definitely a good purchase!
![]() |
| All the lovely swatches! |
![]() |
| All four tested on scrap cream paper |
![]() |
| Other side of the scrap cream paper showing visibility of writing |
Now for the filofax paper - again I just used some random address paper scraps I had lying around as I didn't want to ruin my diary if they bled or were bad for showing through!
![]() |
| All four tested on Filofax standard white paper |
![]() |
| Back of Filofax paper showing ink |
Subscribe to:
Posts (Atom)


